

To improve interaction without disturbing flow, you should place the sushi bar where guests see the chef first, then keep guest, staff, and dish routes separate. Use a gentle curve or straight counter, plus clear sightlines, so everyone feels connected, not crowded. Mix counter seats with a few calm nooks, and use lighting to guide movement and highlight the action. Smart pickup spots and small layout fixes can make the whole room work better.
Key Takeaways
- Center the sushi bar on the main sightline so guests immediately see the chef’s work without feeling boxed in.
- Use a soft curve or gentle U-shaped counter to keep interaction close while maintaining clear staff circulation behind the bar.
- Separate guest, server, and dish-return paths so diners can linger without staff weaving through conversation areas.
- Add modular corner seats, banquettes, or small nooks to support different group sizes while preserving open aisles.
- Use shōji-style screens, lighting zones, and concealed storage to soften noise, hide clutter, and keep the room visually calm.
What Makes a Sushi Bar Layout Flow Well?
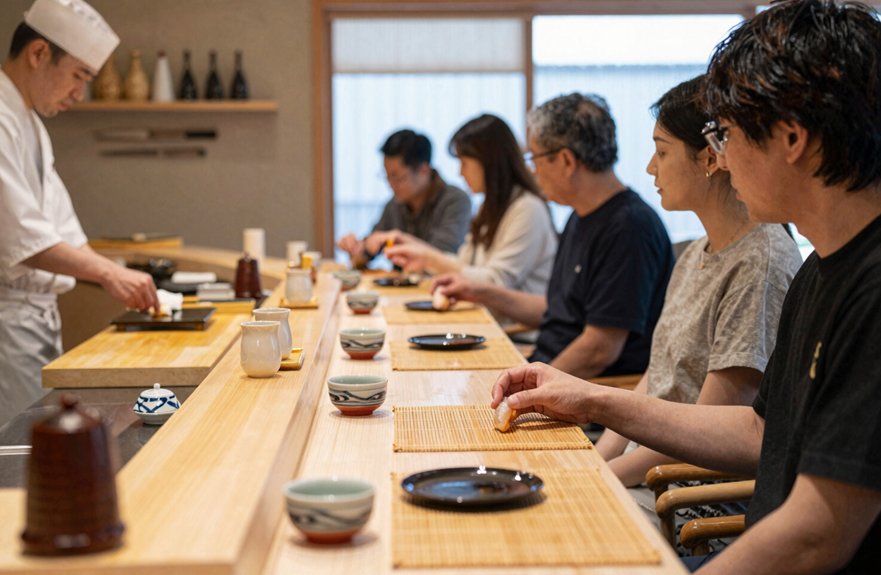
A sushi bar layout flows well when guests can see the space distinctly, staff can move without weaving through traffic, and the whole room feels calm instead of cramped. You want clear sightlines across the guest zone, so people feel relaxed and never boxed in.
Use Lighting Zoning to guide attention and soften busy edges, while Seat Wayfinding helps guests read the room and choose a spot with ease.
Split circulation so about 40% supports the guest experience and 60% supports operations, and let paths curve gently instead of running straight like a race lane.
Place screens where you want privacy, but keep the bar visible, so interaction stays high and movement stays smooth.
That balance gives you freedom, not chaos.
Start With the Chef’s Sightline
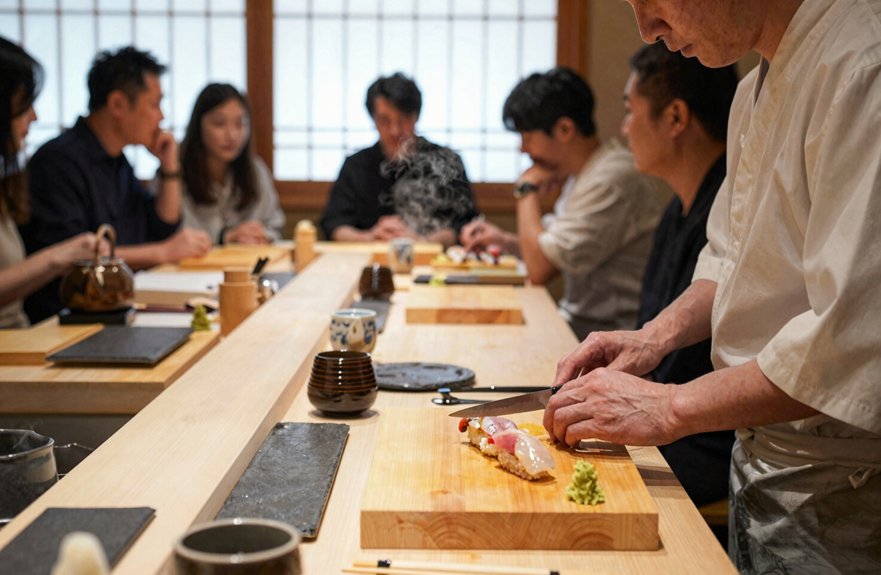
You can center the sushi bar so the chef becomes the focal point, and guests can watch the cutting, rice work, and plating without twisting in their seats.
Keep the chef’s visibility clear with a straight or gently curving counter, then place stools or low seating that face forward so the sightline stays open and the flow stays smooth.
When you guide guests with that clear line of view, you make the space feel easier to read, more inviting, and just a little more polished, like the room already knows where the action is.
Center The Sushi Bar
When you center the sushi bar, the chef’s work becomes the room’s main sightline anchor, so guests notice the action right away without needing to wander. You can then shape a clean path from the entry to the counter, which keeps the room feeling open and free.
Place service routes behind or just off to the side, so diners don’t cross paths with staff and traffic bottlenecks stay out of sight.
Use curved seating and tight lighting zones to guide attention, while keeping most seats within a few steps of the bar.
This setup invites easy conversation, supports acoustic privacy, and lets the chef’s craft feel lively, not crowded.
A centered bar turns movement into calm order, with a little theater, not a traffic jam.
Keep Chef Visibility Clear
Start with the chef’s sightline, because that’s what turns a sushi bar from simple seating into a live experience.
You’ll want the counter and work zone synchronized so every guest sees the hands, tools, and fresh ingredients without blocks from stools, partitions, or tall displays.
Keep sake shelves and décor above eye level or back from the edge, and let a gentle straight path support the view.
A central chef theater setup helps you face the busiest seats, so diners stay connected without twisting around like they’ve lost the plot.
Match stool or tatami height across the room, and use lighting zoning plus acoustics considerations to keep the space calm and clear.
Test sightlines at standing and seated eye level, because small changes can quietly kill the magic.
Guide Guests With Sightlines
From the chef’s sightline, the whole sushi bar starts to make sense, so build the counter-height and backsplash coordination to help the chef read the room while guests can easily watch the prep.
You guide movement best when guest zoning feels natural, with clear wayfinding signage from the host stand to the bar and no awkward detours that trap staff.
Keep seating angled for convex visibility, so most diners can see the chef’s work without tall partitions blocking the show.
At the edge of sightlines, add shōji-like screens for ambient privacy, not barriers that cut off the action.
Brighten the prep line with focused lighting, and you’ll support seating comfort, easy decisions, and a relaxed sense of freedom.
Place the Sushi Bar for Easy Access
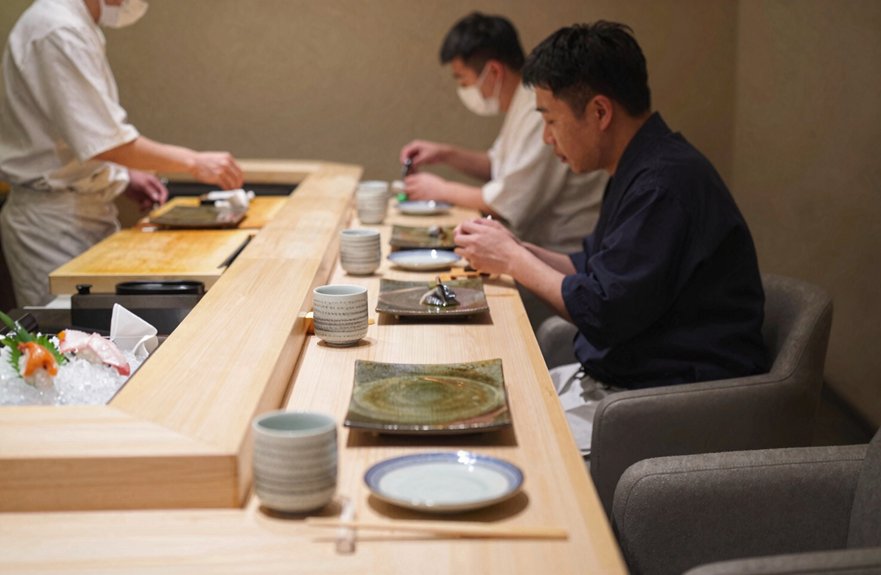
Place your sushi bar where guests first look when they enter, so the chef’s work becomes part of the welcome and not a hidden corner.
Keep service points easy to reach with direct paths for staff, and make sure the bar sits along a clean edge of the dining area so walkways stay open and smooth.
A gentle curved approach can guide people in naturally, helping the space feel comfortable, organized, and easy to use.
Central Sightline Placement
When you center the sushi bar on the main sightline, guests see the chefs and the food presentation right away, which makes the space feel open, inviting, and easy to read.
You also sharpen Chef Focus, because the team works in a clear visual zone that keeps attention on craft, not confusion.
This layout supports Service Timing too, since servers can move with less guesswork and stay in step with the flow.
Place the bar so people can reach it from the entry and seating without long detours, and shape the guest path in a gentle line or curve, so they slow down naturally.
Keep tall dividers out of the view, and let the central bar do what it does best: welcome people, build comfort, and keep the room feeling free.
Clear Service Access
A sushi bar works best when staff can move to every seat in the fewest steps possible, with clean pickup and drop-off lanes that stay open and easy to read.
You get smoother traffic routing when the bar sits beside, not across, your main walkways, so guests can pass without squeezing around stools or counter edges.
Keep staff circulation behind or beside the counter, where servers, chefs, and runners can work without crossing diners.
Good sightline clarity helps the chef theater and handoff zone feel calm, not crowded.
Place storage close by for rice, seafood tools, ceramics, and napkins, so restocking stays quick.
Plan stool spacing and staggered service points so one person can serve, another can clear, and nobody plays bumper cars.
Curved Approach Paths
Guiding guests along a gently curved approach path can make your sushi bar feel more inviting and easier to reach, because the soft turn slows movement just enough to build curiosity without causing confusion.
You give diners a clear, open view as they move, so they don’t feel boxed in or hesitant.
Use lighting cues to lead the eye, and keep the bar on the customer side of your 40/60 split, with staff routes hidden behind screens.
That supports zoned circulation, protects acoustic comfort, and keeps queue behavior calm at busy times.
Place the bar where the curve opens into seating, so guests disperse naturally instead of clustering at one point.
With minimal turns and no crossed paths, you keep access smooth and free, like a well-timed breeze.
Separate Guest, Staff, and Dish Paths
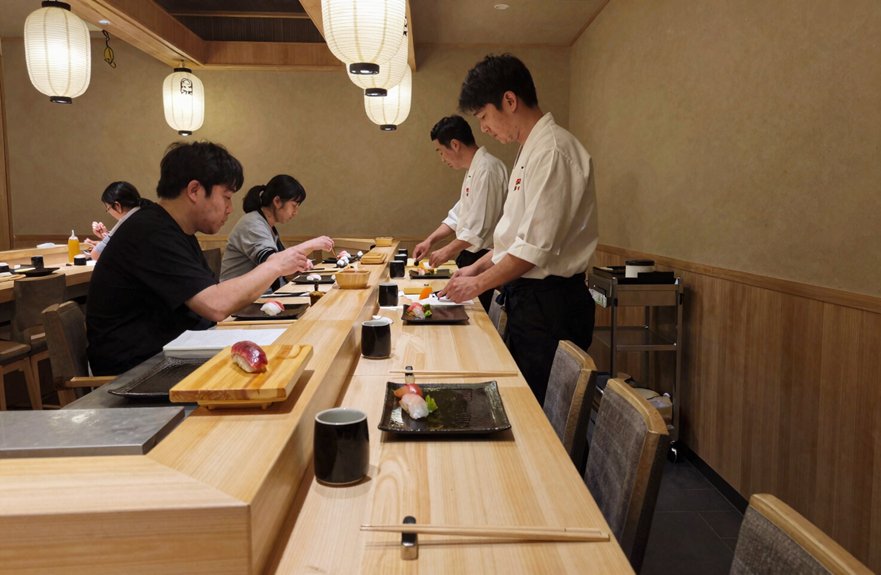
To keep a sushi bar running smoothly, you’ll want guest movement, staff movement, and dish movement to stay in their own lanes.
Guide guest seating so people drift beside the bar, not across it, and keep clear sightlines to the chef’s work zone.
Smart service routing gives your team freedom to move fast without weaving through conversations or bumping elbows.
- Run guest paths parallel to the sushi line.
- Send staff through back-of-house routes for storage and prep.
- Place tray returns and plate handoff lanes behind seating.
- Leave small buffer widths and hidden turn points for smooth loops.
That way, you protect the vibe, cut bottlenecks, and let every move feel calm, quick, and easy.
Choose the Right Seat Mix
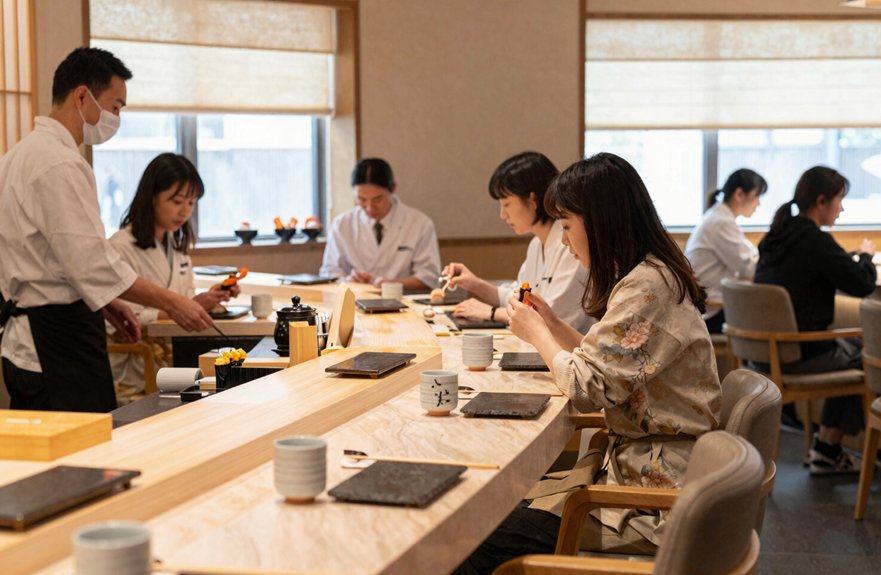
With your guest, staff, and dish paths already set apart, the next step is choosing a seat mix that invites the right kind of interaction without slowing service.
You can lead with omakase-style counter seats, where guests stay close to the chef and feel the energy of the room, then add a smaller set of table or tatami spots for people who want calmer pacing.
Keep your layout simple at the bar, since uniform stools and chairs can lift turnover and support seat pricing goals.
Use modular seats so couples, friends, or larger parties fit easily without blocking circulation.
Place semi-private zones beside or behind the counter to give guests clear views with a little refuge.
That balance supports freedom, comfort, and better group pacing.
Design Corner Seats for Conversation
You can use curved corner seating to create private talk nooks that feel cozy, while still keeping everyone connected to the room.
Aim your chef view angles so guests can watch the sushi action without turning their backs on each other, and place seats where sightlines stay open to the main bar and nearby tables.
Add a little soft acoustic control and warm light, and you’ll make the corner feel comfortable, lively, and easy to talk in.
Curved Corner Seating
Curved corner seating can turn a simple bend in the layout into a welcoming conversation spot, especially when you place it near the shift between the sushi bar and the dining area without blocking the path.
You keep the flow open and still invite people to linger.
- Shape the corner as a convex space so guests face each other easily.
- Use modular boothing or curved banquettes to slow movement just enough.
- Add acoustic zoning with fabric panels or shoji-style screens, so sound stays soft.
- Finish with cedar-toned wood, linen, and one accent light for a friendly photo spot.
You also leave a straight service strip behind the bar, so servers move cleanly, and your guests enjoy freedom without feeling boxed in.
Private Talk Nooks
Private talk nooks build on that same sense of welcome by giving guests a quieter corner where conversation can settle in naturally. You can use shōji-style screen pods to add light privacy without making the room feel boxed in, and warm daylight still slips through.
| Feature | Benefit | Placement |
|---|---|---|
| Corner banquette | Easy two-person comfort | Perimeter |
| Low table | Relaxed sharing | Nook center |
| Screen panels | Soft sound dampening | Side edges |
| Modular seats | Fits different parties | Flexible corner |
| Clear aisle | Seamless circulation | Nearby route |
Set each seat slightly back from the main sightline, so you feel tucked away yet still oriented. Add fabric-wrapped panels for acoustic comfort, and keep server paths direct, so your freedom to talk stays intact while the floor keeps moving smoothly.
Chef View Angles
Corner design seats can make a sushi bar feel lively and easy to enjoy, because they angle diners toward the chef so conversation flows in the same line of sight as the work at the counter. You get a natural exchange without twisting away from service, and that keeps the energy free and open.
- Place the seats where you can watch the chef and still glance into the room.
- Keep the server path clear, so plates and refills move fast.
- Use the corner for menu tasting pacing, letting each bite land with a calm pause.
- Add guest comfort lighting: brighter over the bar, softer at the edges.
With prospect–refuge balance, you feel both sheltered and included, so the whole experience stays relaxed, social, and smooth.
Use Counter Shape to Guide Interaction
When you shape the counter to guide how people gather, you can make the room feel welcoming without slowing service.
Choose a soft curve or gentle U shape, so guests keep facing the chef while traffic stays smooth behind the bar.
A concave edge with a wider center creates Chef theater bays, and that concave interaction zoning pulls attention to the prep area where it matters most.
Add small breaks or width changes to form subtle bays, and you’ll help groups settle in naturally, with less crowding and more comfort.
Keep the front lip and sightlines concordant so staff can move straight through the back corridor, not weave through guests.
Done well, this layout can boost seat turnover and keep the experience free, open, and easy.
Hide Storage Behind the Sushi Bar
You can hide rice, fish tools, napkins, and spare ceramics in a concealed space behind the sushi bar, so your team can restock fast without cluttering the counter.
With flush panels and easy-access doors, you keep the bar looking clean while preserving clear sightlines to the chef’s work.
This setup also helps guests stay focused on the craft, not the mess, which makes the whole space feel calm and polished.
Concealed Prep Storage
Tucking prep storage directly under or behind the sushi bar keeps the workflow smooth, because chefs can reach rice, nori, sauces, knives, towels, and ceramics without stepping into guest paths. You keep the space open, and your team moves with more freedom. Use drawer zoning and labeling systems so every item has a clear home.
- Put daily tools at mid-torso height.
- Store backups deeper inside.
- Add discreet doors or pullouts for chefs and servers.
- Choose sealed stone, quartz, or coated metal inside.
Airtight drawers and vertical rails let you restock fast, while easy-clean finishes cut odors and stains. You’ll protect diner flow, support quick table turns, and keep the bar feeling calm, not chaotic, even when service gets lively.
Keep Bar Clutter-Free
A clean sushi bar does more than look polished—it helps service feel calm and effortless. You can hide rice, fish tools, napkins, and ceramic pieces in under-counter drawers and service hatches, so the guest-facing bar stays open and easy to read.
Use back-bar tool rails and labeled compartments to keep necessities close without building a clutter line. That supports better Guest Communication, clearer Menu Placement, smoother Queue Management, and tighter Service Timing, because you’re not hunting for supplies mid-order.
Keep takeaway boxes and backup stock behind closed panels, and leave generous negative space where guests look. Choose sealed stone, quartz, or wood surfaces that wipe fast, so hidden storage stays hygienic and neat.
When everything has a place, your bar feels freer, faster, and far less fussy.
Preserve Chef Visibility
When guests sit at a sushi bar, they should feel like they’re watching a calm performance, not a storage room, so keep dishware, towels, tools, and backup ingredients hidden behind the counter in fitted cabinets and wall-depth storage.
You protect that chef theater by shaping clean sightlines and framing the cook with a solid bar face, slatted wood, or shoji-like screens.
Use
- toe-kick cabinets for quick grabs,
- labeled zones for rice, knives, soy, and plates,
- small service hatches for restocking,
- heat-safe, easy-clean finishes that support smooth turnover.
This setup keeps guest circulation free, cuts visual noise, and lets you tune lighting zoning and sound control for a relaxed room.
You’ll give diners freedom to enjoy the craft without seeing the mess.
Plan Clear Routes to Restrooms and Exit
Clear routes to the restrooms and exit should feel obvious the moment a guest looks up, so you want the straightest, clearest paths possible through the dining room. Keep these lanes open, and skip screens or carts that block sightlines. Use simple wayfinding signage and queue management to guide movement without crowding.
| Cue | Effect |
|---|---|
| Open lane | Easy glide |
| Clear corner | No backtrack |
| Quiet floor | Calm signal |
| Side staff door | Guest freedom |
| Gentle curve | Smooth travel |
Plan for convex visibility, so diners can see where they’re going at a glance. Place staff routes behind or beside the bar, away from guest flow. Use consistent flooring and low visual clutter, and you’ll help people move fast without feeling pushed. That freedom keeps the room relaxed and the service flow intact.
Keep Omakase Exciting Without Slowing Service
At the omakase counter, you want the drama to feel close and personal, not spread out and hard to manage, so seat guests within a short, direct viewing arc of the sushi prep line and keep the chef-led progression easy to follow.
- Brighten the station with crisp task lighting, so each plate looks photo-ready without extra check-ins.
- Guide chef, server, and dish returns on separate paths, and keep service moving with no awkward crossovers.
- Group seats into 6–8 person micro-zones, so you can vary pacing while avoiding bottlenecks.
- Edit the room to one or two focal points, using soundtracking ambiance and guest emotion cues to hold attention.
That way, you keep the theater alive, protect flow, and give guests the freedom to relax, watch, and savor every course.
Keep Waiting Areas Out of the Way
Once the omakase counter is humming, the next challenge is keeping waiting guests from spilling into the main route, because even a small crowd can slow service and make the room feel crowded fast. Place seats off the path, and keep a back-of-house safe line open so staff move freely. Use Architectural signage and queue tokenization to guide arrivals without confusion. A convex sightline helps hosts spot who’s waiting, while compact benches or tatami niches leave room to pass.
| Move | Why it helps | Guest feeling |
|---|---|---|
| Shift wait zone aside | Protects flow | More freedom |
| Add partial screens | Softly separates space | Calm, clear |
| Keep aisles wide | Lets servers glide by | Less friction |
| Limit pinch points | Cuts bottlenecks | Easy arrival |
Use Lighting to Define Zones
Lighting can do more than make a sushi bar look beautiful, because it can quietly guide how people move, pause, and connect. You can shape freedom with light, not walls, and let each zone feel open yet distinct.
Try this:
- Use ambient light for calm comfort.
- Add brighter task light over the counter.
- Keep dining seats warmer and softer with color contrast.
- Aim accent lights at the chef, sake, or textured art.
That layered plan helps guests read the room fast, while glare control keeps eyes relaxed. Choose high-CRI warm-white or daylight bulbs so sushi looks vivid and true, which matters for both taste and photos.
Dimmable fixtures let you shift the mood from lunch to dinner without losing balance, so your space stays welcoming, flexible, and easy to enjoy.
Set Up Pickup Spots Without Bottlenecks
A well-planned sushi bar doesn’t just guide the eye, it also keeps takeout moving smoothly, so guests in the dining room never feel crowded by pickup traffic.
You can place a clear, single-direction pickup zone near the host stand, where staff hand off orders without cutting through seating.
Keep the counter away from the busiest chef theater views, so diners stay focused and service flows faster.
A short staging shelf behind the pickup point lets your team move each order from prep to handoff in one clean motion.
Build in a small waiting space for queue management, and use signage cues to show where to stand.
Choose simple, easy-clean surfaces and hidden storage, and you’ll keep the area calm, open, and free for the freedom your guests came for.
Solve Small Sushi Bar Layouts
How do you make a small sushi bar feel open, lively, and easy to move through? You shape compact queueing around a wall or soft curve, so your team keeps a clean two-lane loop and guests still see the chef show. With narrow circulation, every step matters, so keep sightlines clear and let the host track tables from one spot.
Try this:
- Use 1–2 counter rows.
- Add a few offset two-top stools.
- Plan modular staging for server drop-offs and drinks.
- Build backtrack avoidance into every route.
This setup keeps people flowing, cuts crossing paths, and helps the room feel freer, not squeezed. Minimal furniture can even speed turnover, which is nice when the sushi’s disappearing fast.
Common Sushi Bar Flow Mistakes to Avoid
Even a beautiful sushi bar can feel awkward if the flow is off, so it helps to avoid a few common layout mistakes before they slow service or spoil the guest experience.
Keep the sushi counter out of the main path, and give chefs, servers, dish return, and beverage service clear non-crossing routes.
Skip long, straight aisles with hard sightline breaks; gentle curves help guests relax and reduce staff weaving.
Don’t crowd the counter with props or busy shelving, since clutter steals focus from the craft.
Move pickup, displays, and bus stations to the edges so seating stays calm.
Finally, protect Acoustic comfort with wider spacing, because tight seats create guest bottlenecks, trigger service detours, and make queue management harder.