You need storage that keeps pans, tools, and ingredients close, so you can move fast without crowding your line. A restaurant speed rack, wall shelf, or mobile cart can hold common pans, save steps, and keep your team organized during service. Choose NSF-rated, corrosion-resistant materials, match the rack to your aisle and door space, and use FIFO, off-floor, and ceiling storage to cut clutter. Keep going, and you’ll see how each setup boosts flow.
Key Takeaways
- Use vertical, off-floor storage so pans, tools, and supplies stay visible, organized, and easy to grab during service.
- Choose rack sizes and layouts that match your aisle space, oven openings, and standard 18″ x 26″ pans.
- Prioritize stainless steel or powder-coated, NSF-rated racks that resist corrosion and handle frequent cleaning.
- Keep high-turn items at eye level and group products by category for faster picking and simpler inventory counts.
- Use mobile or wall-mounted racks near prep, coolers, and dish areas to reduce walking and speed workflow.
What Is a Restaurant Speed Rack?

A restaurant speed rack is a vertical storage system that helps kitchen teams keep the items they use most within easy reach during service. You can use it to hold pans, tools, and prep supplies in a neat, open setup that cuts clutter and gives you more room to work.
Many racks fit standard sheet pans, so Tray Management feels simple and steady, not like a juggling act. You can mount one on a wall, attach it to a cabinet, or roll it where you need it most.
This flexibility helps you shape the kitchen around your workflow, not the other way around. With smart Spice Organization and quick access to gear, you stay organized, move freely, and keep your station ready for whatever comes next.
Why Speed Matters in Kitchen Storage

When kitchen storage moves fast, your whole service runs smoother, because every second you save on grabbing, sorting, or moving supplies adds up during a busy shift. You gain freedom when shelves support ergonomic workflows, not backtracking.
Mobile racks keep pans close to ovens and fridges, so you move less and cook more.
- Place first-use items on the outside.
- Keep top picks near five-foot height.
- Group meats, vegetables, and other categories.
- Leave traffic lanes open and clear.
- Check fit with your layout before you commit.
That simple setup cuts confusion, speeds inventory turnover, and helps you stay in control without extra hassle.
In a tight kitchen, a smart storage path feels like a shortcut to sanity, and honestly, who needs one more detour?
How to Choose a Restaurant Speed Rack
Start by measuring your wall and aisle space, then choose a wall-mounted or freestanding speed rack that fits the way your sheet pans move between ovens and refrigerators.
Next, look for tough, moisture-resistant materials like powder-coated steel or stainless steel, because your rack needs to handle a busy kitchen without rusting or wearing out too soon.
Finally, check the weight rating, adjustability, and pan fit, so you can store heavy loads, save vertical space, and mount it safely with the right hardware.
Space And Layout
Before you choose a restaurant speed rack, take a careful look at the space you have and how your kitchen moves, because the right rack should make work easier, not add another obstacle.
Measure walls, aisles, door swings, and the path to ovens and reach-ins, then use that map to maximize Aisle Clearance and guide Tray Access Planning.
Choose a wall-mounted rack if you only have vertical room, or a freestanding, mobile unit if you need to roll trays from prep to storage.
Make sure trays can pass through doors and into refrigeration without crowding counters, so your team keeps moving freely.
- Check sheet pan size
- Match rack to footprint
- Protect traffic flow
- Verify door clearances
- Group pans by use
Material And Durability
Just as important as size and layout, the material of your restaurant speed rack can make a big difference in how well it holds up in a busy kitchen. You’ll want stainless steel or powder-coated steel for strong corrosion resistance, especially if steam, spills, and constant wiping are part of your day.
Skip racks that need lots of babysitting, because freedom in a kitchen means less time fixing gear and more time moving fast.
Look for NSF rated construction, since it shows the rack is built for food-service use and easier cleaning.
A durable finish also helps the rack stay solid through frequent loading and unloading, so you’re not replacing it before it’s earned its keep.
Choose one that feels tough, dependable, and ready to work.
Capacity And Adjustability
Once you know the space you have, you can choose a speed rack that fits your kitchen instead of fighting it every day. Start with load planning, then match the rack to your usual pans, trays, and tools. Check tier spacing and shelf height so you can move from flat sheet pans to taller boards without wasting room.
- Measure your wall or floor footprint
- Match standard 18″ x 26″ trays
- Compare adjustability ranges before you buy
- Check weight ratings for heavy loads
- Confirm secure mounting and leveling
Choose adjustable shelves or hooks, because freedom in the kitchen means you can change fast when service changes. A rack with strong weight capacity and the right layout keeps traffic moving, and it won’t make you wrestle with every pot like it’s a stubborn guest.
Choose the Right Rack Size
How do you choose a rack size that actually speeds up service? Start with the pans you already use, usually 18″ x 26″, so your rack fits your workflow instead of fighting it. Use adjustable shelving and clear access to keep trays moving fast.
| Check | Why it matters |
|---|---|
| Pan footprint | Matches your production line |
| Kitchen space | Protects aisle freedom |
| Load rating | Handles your real workload |
Measure oven and refrigerator openings before you buy, because a rack that squeezes in can slow every transfer. In tight kitchens, a half-size rack can save space without losing order. Place it so sheet trays roll between hot and cold storage with no extra staging. Then verify the weight band, whether 1500–1799, 1800–1999, or 2000–2199 lbs., so your setup stays steady and ready.
Pick the Best Speed Rack Material
When your kitchen stays busy, the rack material matters just as much as the size, because the wrong finish can rust, stain, or wear down fast in damp prep and dish areas. Choose stainless steel or powder-coated metal for solid corrosion protection, and you’ll keep moving with less worry. If you’re comparing cheaper options, don’t settle for “metal” on the label; ask for coating verification so you know what’s really guarding the surface.
- Pick NSF-certified options when you can
- Favor finishes that handle washing and sanitizing
- Choose stainless for tough moisture zones
- Use powder-coated metal for budget-friendly strength
- Avoid materials that degrade with repeat loading
That way, you get a rack that works hard, stays clean, and gives you more freedom to focus on service.
Match Capacity to What You Store
To keep your kitchen moving fast, match your storage capacity to the pans and trays you actually use, not just the biggest rack you can fit in the room.
You’ll get better tray compatibility when you plan around common 18″ x 26″ sheets, then group meats with meats and vegetables with vegetables so each tier earns its keep.
Load band planning matters too, because a rack that looks sturdy may still fail your real weight needs.
If space is tight, half rack workflows can protect aisle freedom without cutting your storage categories.
Put your most-used items near the 5-foot reach zone, where hands move fast and trips drop.
Smart pick path optimization keeps you moving, not hunting, and that’s a freedom worth keeping.
Use Speed Racks in Prep Areas
In a busy prep area, speed racks can keep your sheet pans—often the standard 18″ x 26″ size—right at arm’s reach, so your team can move from one task to the next without stopping to hunt for equipment. Set them up with zone workflow mapping, and you’ll keep traffic flowing and freedom intact.
- Place first-use items at about 5 feet high.
- Put the most used trays on the outside.
- Group meats with meats, vegetables with vegetables.
- Leave a clear path to ovens and refrigeration.
- Clean, sanitize, and wipe tracks after use.
Menu labeling systems help you load each rack in a consistent order, so every cook knows what’s where. That simple structure cuts backtracking, reduces mix-ups, and keeps your prep line moving like it should.
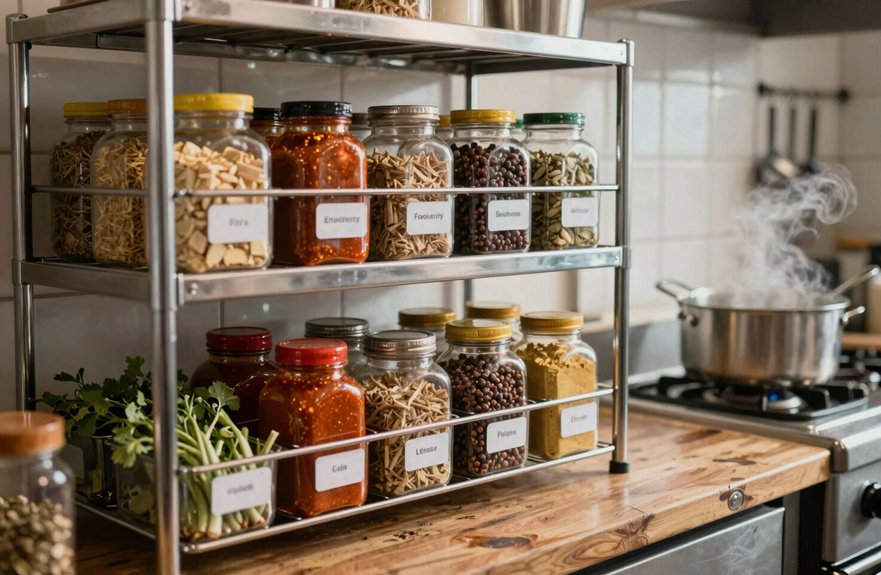
Organize Dry Storage for Faster Picks
You can speed up dry storage picks by placing your most-used items in clear, front-facing spots, so your team can see stock levels at a glance and grab what they need without extra searching.
Labeled FIFO can racks, including mobile versions when you need them, make counts easy to read and move, so you can check inventory faster and keep traffic flowing.
When you group similar items together and keep storage off the floor where possible, you cut confusion, open up your aisles, and make every pick feel a little less like a treasure hunt.
Visible Inventory Counts
- Keep each product on the same shelf
- Group related items by category
- Place high-turn cans at eye level
- Use FIFO-focused full-size racks
- Mark every zone evidently, so nobody plays hide-and-seek with soup
When you count from an evident layout, you move quickly, miss less, and avoid the quiet chaos that slows a shift.
Smart visibility isn’t fancy, it’s simply free-flowing control.
Mobile Can Rack Access
When your dry storage needs to move fast, mobile can racks make canned goods easier to see, reach, and count without the usual bending and digging.
You keep cans upright, grouped by size, and set in labeled rack zones, so inventory labeling stays clear and your team knows exactly where each item lives.
That simple rack zoning supports a smoother picking workflow, because staff can roll the rack into open access lanes, grab what they need, and move on without extra trips.
FIFO-friendly layouts also help you pull older cans first, so stock rotates cleanly.
Since the racks match common can formats, you speed up counts during ordering too.
And when it’s time to clean, you just shift the rack and sweep underneath, no dust bunnies invited.
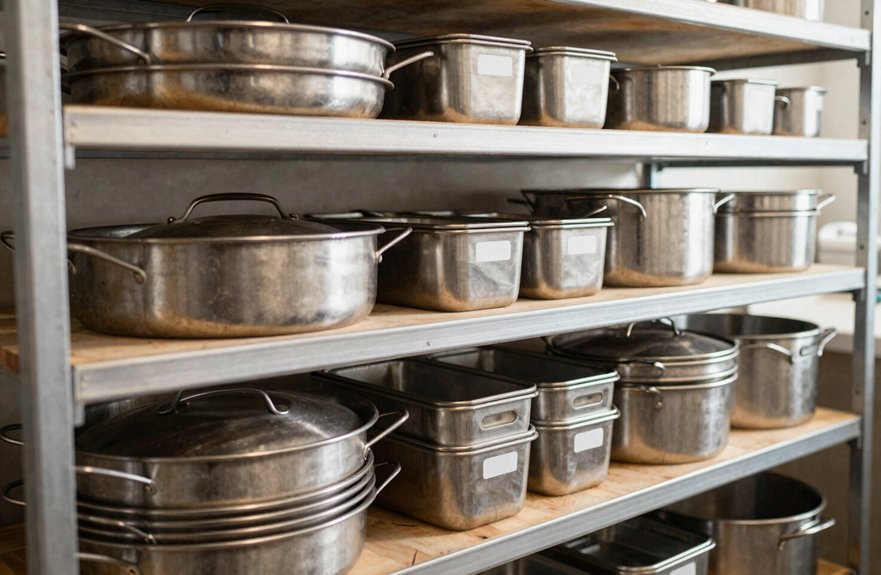
Store Dish Room Items Off the Floor
In the dish room, keeping crates, racks, utensils, and dishware off the floor helps the whole space work better and stay safer. You free up room, cut clutter, and keep water from pooling around standing storage.
Use wall-mounted shelving, vertical storage, and mobile units so you can move fast without tripping over piles.
- Support safer charging with mounted spots for busy tools
- Use off floor loading to keep pathways open
- Leave wall clearance for easy cleaning and quick grabs
- Build storage zoning so each item has a clear home
- Keep bulk items off the floor, so your dish cycle keeps rolling
This setup gives you more control, more freedom, and less drag when the rush hits.
Maximize Cooler and Freezer Space
You can make every inch of your cooler and freezer work harder by using ceiling-mounted storage and insert racks, which keep product off the floor and help you use tight spaces well.
When you build storage upward and organize items by category, you cut clutter, protect airflow, and make it easier for your team to grab what they need fast.
A smarter layout also helps you avoid cramped paths and wasted steps, so your cold storage supports speed instead of slowing everyone down.
Ceiling-Mounted Storage
Ceiling-mounted cantilever shelving can make a big difference in walk-in coolers and freezers, because it frees up valuable floor space while still giving you long, sturdy storage runs for bulky items.
In your walk in freezer, you keep products off the floor, protect floor access, and make cleaning easier too.
You also reduce aisle clutter, so you can move fast without feeling boxed in.
- You gain open pathways for carts.
- You store bulky items without blocking doors.
- You keep items higher and easier to find.
- You support cleaner, code-friendly storage.
- You create a freer, more organized work zone.
If you need extra security inside the enclosure, overhead shelving can work with a fenced zone while still preserving usable space.
When you plan the layout well, you save steps, cut hassle, and keep speed on your side.
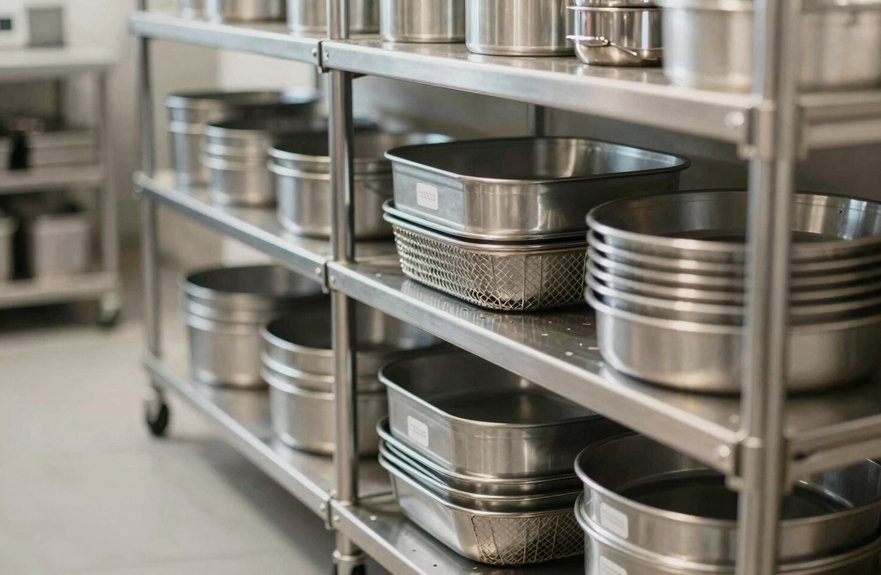
Insert Racks
When your cooler or freezer starts feeling too tight, insert racks can open up a surprising amount of space by turning a plain walk-in into a more efficient storage system.
You gain multiple tiers for sheet pans and steam table pans, so you can store more without crowding the floor. That means better cooler organization, faster picking, and fewer awkward detours with full hands.
Because many racks fit common doorway clearance needs, you can keep access simple while using more of the room’s vertical height.
You also stay cleaner and more compliant, since products sit off the floor and spacing stays orderly.
Choose corrosion-resistant racks with strong weight ratings, and you’ll build a setup that works hard, moves fast, and gives you more freedom in a busy kitchen.
Add Wall and Ceiling Storage
To keep a kitchen moving fast, use the space above and beside your work areas as hard-working storage. You’ll protect your freedom to move when you build for zoning workflow, clearance planning, spill prevention, and load rating from the start.
- Mount speed-rack style organizers for trays, utensils, and small tools.
- Use wall and corner mounts near freezers and refrigerators for grab-and-go items.
- Choose ceiling-mounted cantilever shelving for bulky supplies.
- Prioritize wall and overhead storage in tight dish areas to cut clutter.
- Measure doors, ovens, and fridge clearances before you install anything.
This setup keeps counters open, frees floor space, and helps you avoid overstacking that can bend sheet pans or slow you down. With the right layout, your kitchen feels lighter, safer, and ready to move.
Keep Your Speed Rack Clean and Mobile
A speed rack works best when it stays clean, clear, and easy to roll, so make upkeep part of your daily routine.
Before Deep cleaning, pull every sheet pan off completely, then wipe the tracks, rails, and surfaces you touch most.
Wash and sanitize the rack like any other food-contact tool, and don’t let sticky residue set up and act stubborn.
Your scheduled maintenance should include debris prevention, because crumbs and bits can jam trays or make the rack roll unevenly.
After items cool and are handled, return trays carefully so rails stay open and ready.
A little track lubrication, when the manufacturer allows it, can help mobility too.
When you keep it clean, your speed rack moves fast, and so do you.