A compact prep station keeps your tools within 12 inches of the work area, so you can pivot, not pace, while you prep. You should set the board at standing height, lock it in place, and build the station in order of use with clear zones for clean, raw, and scrap tasks. Add dated pans, labels, and a stable finish, and you’ll work faster, safer, and with fewer little surprises, as the details ahead show.
Key Takeaways
- Keep tools, pans, and scraps within a 12-inch reach so pivoting replaces extra walking.
- Use a full-width HDPE core board flush with the refrigerated rail for smooth, compact workflow.
- Arrange ingredients in build order and label stations to reduce guesswork and wasted motion.
- Lock prep stations on casters before cutting, assembling, or transferring to prevent shifting.
- Separate raw zones with dedicated tools, scrap pans, and color coding to maintain speed and safety.
What Makes a Compact Prep Station Work?
What makes a compact prep station work best? You keep every tool within 12 inches, so you pivot, not pace, and your throughput stays steady.
Build the line around a full-width HDPE board that sits flush with the refrigerated rail, then arrange ingredients in build order, left to right or right to left, so your hands stay busy and your feet stay free.
Use FIFO with dated pans, swapping in fresh chilled pans instead of topping off.
Add color coded zoning, lane traffic rules, and clear contamination signage to cut reaching and confusion.
Put grab and go trays at the edge, use dedicated allergen-zone ends, and choose smallwares that reduce drop-off moves.
That way, you work fast, clean, and with room to breathe.
Choose the Right Prep Station Layout
When you choose the right prep station layout, you set the pace for the whole line, because a smart setup keeps every tool, pan, and smallware within the 12-inch rule so your team can pivot instead of taking extra steps. Build a left-to-right or right-to-left flow, and put the landing zone to the right of hot work so transfers stay neat and safe.
| Layout choice | Benefit |
|---|---|
| Full-width core | Keeps staging smooth |
| 2 person efficiency | Cuts wasted motion |
| station labeling | Ends guesswork fast |
| FIFO swap rail | Keeps pans fresh |
| Order-by-use setup | Saves seconds |
A 72-inch line can push strong output, and when you place items in use order, freedom comes from less searching, less waiting, and more doing.
Why Prep Tools Stay Within Arm’s Reach
At arm’s length, a good prep station helps your team move fast without wasting steps, because every tool stays within about 12 inches of the work area and hands can pivot instead of travel.
You keep throughput pacing steady when knives, boards, pans, and scrap trays all sit where you expect them.
That’s the heart of zone workflow design: each motion has a place, so your team can slice, sort, and pass food without hunting.
Height-adjusted surfaces and board stoppers cut strain, while tray-based landing zones make transfers quick and smooth.
With color-coded tools and holders, your hands return to the same spot every cycle.
If the station rolls on locked casters, you can reposition it fast, then get back to work, not wandering.
Set the Cutting Board at Standing Height
Set the cutting board at standing height so your team can work comfortably and keep chopping motions efficient.
You’ll create an ergonomic setup that supports posture improvement, because the board sits where your arms can move naturally and your back doesn’t have to lean or twist.
With an adjustable prep-table system, you avoid the awkward angles that fixed tables can cause over time, which helps with strain reduction and steady focus.
Keep the board within arm’s reach, so your workspace efficiency stays high and you don’t waste steps or stretch past a relaxed range.
When everything sits at the right height, you can switch tasks faster, grab accessories with ease, and keep your prep flow smooth.
Freedom feels better when your station works with you, not against you.
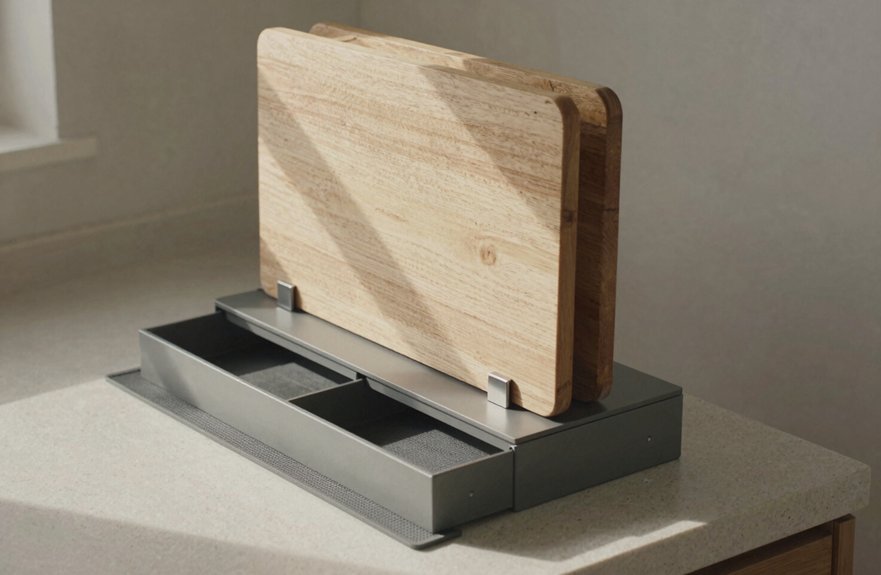
Lock the Board in Place for Safer Chopping
Lock your cutting board in place with built-in stoppers or a rail system, so it stays at the right height and doesn’t shift while you chop.
You can also anchor it with a wet towel or cloth underneath, which helps prevent sliding and keeps your knife work steady and safe.
When the board sits flush and secure, you spend less energy correcting wobble, and you can finish prep with more control and confidence.
Secure Board Stability
When you’re chopping, a steady board makes all the difference, so use the PrepMate board stoppers and keep the board set to the right standing height along the rail. You’ll feel the benefit right away, because a locked board cuts the wobble that turns simple prep into a strain. With smart board material choices and non slip surface prep, you build a base that supports clean, confident cuts.
If your board sits on an unadjustable metal table, it can slide when you press down, which raises risk and slows you down. Set the height so your back and arms stay relaxed, then work with the board within easy reach.
After prep, pull the stoppers on either side, and free the board for quick cleanup and transfer.
Prevent Shifting During Chopping
Once your board sits at the right height and feels steady under your hands, the next step is making sure it can’t shift at all while you chop. You want freedom at the station, not surprise slips, so use a cutting board with stoppers and a stable rail, then check surface traction before the first knife stroke.
That setup boosts grip safety and helps your arms stay relaxed, because the right table height cuts wobble and fatigue.
- Use towel anchoring with a wet side towel, or paper towels for raw chicken, to lock it down.
- Keep the board fixed for the whole prep block, not just “usually” stable.
- Release the stoppers when you’re done, so you can scrape fast into pans below without wrestling the board.
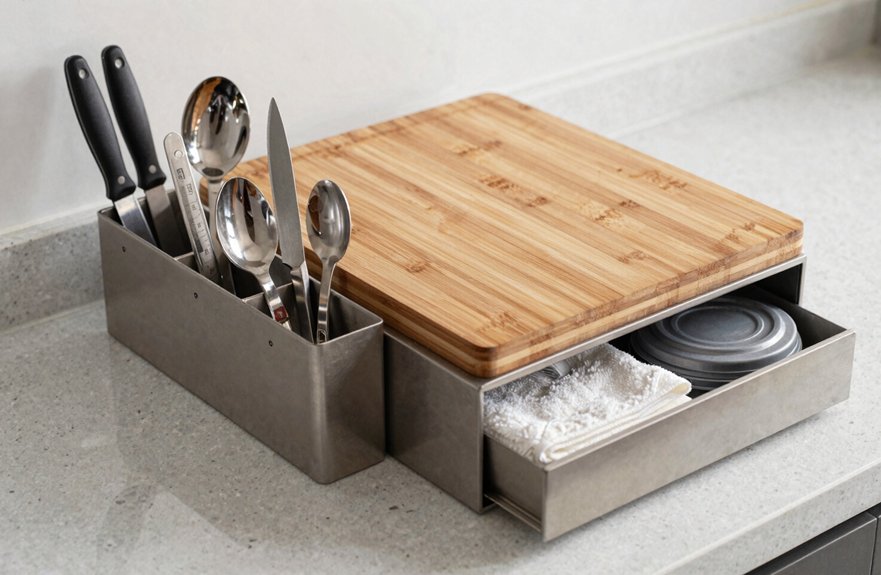
Use Scrap Pans to Clear the Work Surface
Right beside your cutting board, a scrap pan can make a big difference in how smoothly prep moves along, because peels, trimmings, and small bits drop straight into it instead of cluttering the work surface.
Keep that pan within a tight 12-inch reach, so you can sweep scraps in without stepping away or breaking your rhythm.
A stainless hotel pan works well, since you can sort waste cleanly for stock, fumet, compost, or disposal.
With board stoppers holding the board steady, you cut with more control, then remove the side stoppers and clear the area fast.
That simple setup supports Cross Training Workflow and Waste Reduction Goals, while limiting product loss and spilled debris.
You stay free to move, stay focused, and keep the line moving.
Build a Faster General Vegetable Prep Station
To build a faster general vegetable prep station, start with a compact setup centered on a properly sized HDPE cutting board that sits flush to the rail, so your clean as you go routine stays smooth and steady.
Keep your knife control sharp by staging produce within 12 inches, so you pivot instead of stepping and save energy for the cut.
- Use a wet side towel to secure the board and support wrist efficiency.
- Keep a folded wet towel close for quick wipes, so board sanitation never turns into a reset.
- Set a scrap pan or catch tray beside you, then peel and trim straight into it.
If you use stoppers, lock the board during work, then remove them and slide prepped vegetables into pans without extra fuss.
Prevent Cross-Contamination at Chicken Prep
Set up a dedicated raw chicken zone before you start, with a plastic cutting board inside a rimmed half-sheet pan so drips stay put and your counter stays clean.
Keep your poultry shears, knife, gloves, and a scrap container right beside you, so you can trim, move bones, and handle waste without hunting around mid-task.
Wipe the board and knife between steps, use paper towels to anchor the setup, and toss them when you’re done so you keep the workflow clean and simple.
Raw Zone Setup
When you’re prepping chicken, the safest move is to create a dedicated Raw Zone that keeps messy work contained from start to finish. Set a plastic cutting board in a rimmed half-sheet pan, then line the area with disposable paper towels so drips stay put and cleanup stays easy.
Pre-stage a landing zone and scrap container before you touch the bird, because freedom feels better when you’re not crossing the kitchen mid-task.
Keep your knife only workflow tight, and practice glove discipline by handling raw chicken only inside this zone.
- Use gloves for grip, then stay in bounds.
- Trim with poultry shears, not shared tools.
- Toss towels after you finish, and move on.
Separate Tools Ready
A chicken-only toolkit keeps your prep calm and clean, because every tool you need should stay within a 12-inch reach so you can move in place without taking a single step. Set up tool organization with a reserved chicken shears pair, a scraper, and a scrap bowl, then label each item so you never mix it with gear used on nonstick griddles or other foods. Your station workflow stays freer when the board sits in a rimmed half-sheet pan, anchored by paper towels, and your landing zone waits before you touch the bird.
| Tool | Use | Keep Here |
|---|---|---|
| Shears | Backbone, tips | Chicken station |
| Scraper | Scrap control | Pan edge |
| Bowl | Trimmings | Landing zone |
| Board | Raw prep | Rimmed pan |
| Labels | Utility labeling | Toolkit |
When you’re done, toss the towels.
Clean Hand Workflow
For a cleaner chicken prep, build your station before you touch the bird, because a good hand workflow starts with smart placement. Set a plastic board in a rimmed half-sheet pan, then anchor it with paper towels, not cloth, so drips stay trapped and cleanup stays easy. Keep separate tool zones, with one spot for your knife and another for scraps, so you don’t reach across raw meat. Use a clean hand workflow: keep one hand dry for flour or crumbs, and the other wet for chicken, and you’ll cut cross-contamination fast.
- Place your landing zone first.
- Use a glove free handling strategy only if you can keep control.
- Drop bones and trimmings into a dedicated container.
When you’re done, toss the towels and move on free.
Set Up a Fish Prep Station That Stays Clean
Because fish prep moves fast, it helps to build a station that stays tidy from the start.
Secure your plastic cutting board with a wet cloth towel, not a sheet tray, so it won’t slide while you work.
Stage your fillet knife or deba, utility knife, and fish tweezers right at the board, and keep Glove Hygiene in mind so you can switch tasks cleanly.
Add a small water cup for Pin Bone Rinsing, which cuts residue and keeps Tool Contamination down.
Place a scrap container close for heads and bones, and set a parchment-lined rimmed baking sheet nearby for finished fillets.
Watch Cleanup Timing as you go, and you’ll keep the station open, efficient, and free enough for smooth, confident movement.
Keep the Breading Station in Hand
At the breading station, keep one hand on the dry side and the other on the wet side so the process stays smooth and fast. You’ll protect your hand swap rhythm, keep wet dry separation clear, and move with real motion economy. Set flour, crumbs, and trays where you can reach them without stretching, then run every piece through the same dip, dry coat, crumb pattern. That steady order gives you better crumb control and keeps the work feeling free, not fussy.
- Keep dry items on one side, wet items on the other.
- Swap hands the same way every time.
- Wipe landing spots between batches so crumbs don’t drift.
With a compact layout, you stay in control, avoid clumps, and keep the station ready for the next piece.
Move the Prep Station on Locking Casters
You can roll a compact prep station right where you need it, then lock the casters to keep it steady while you chop, assemble, and move fast.
That gives you control without extra steps, so your tools stay in easy reach and your workflow feels smooth.
Before you cut, scrape, or transfer ingredients, make sure the brakes are set, because a still station is safer and a lot less messy.
Locking Casters For Control
A compact prep station with four locking casters gives you the best of both worlds: easy movement when you need to clean, set up, or tuck the table under a counter, and firm stability when it’s time to cut, assemble, and work with care. You can keep workflow organization tight and tool accessibility high, because the station stays exactly where you place it.
- Roll it into position, then lock it before prep starts.
- Stop tiny shifts that can nudge boards, knives, or bins.
- Keep your right-side landing zone lined up for smooth left-to-right work.
With the brakes on, you get a steadier surface for repetitive, within-reach tasks, and your ~12-inch pivot area feels more exact. That kind of control helps you work with more freedom and confidence, without chasing a wandering table.
Roll It, Then Brake
Once your prep station is rolled into place, lock the four casters so it stays steady while you chop, assemble, and move from one task to the next. You can set it where every tool sits within a true 12-inch reach, then pivot instead of stepping, which keeps your hands quick and your workflow free.
Keep the left-to-right layout the same, with the oil or active work zone near the burner or core line, so you don’t waste energy resetting counters. That simple workflow safety check protects chilled ingredients and clear landing zones.
Build brake timing habits into setup: roll in, stage prep, then brake before you start. Penn State testing found that this moving-and-locking rhythm can lift productivity by about 20%.
Size the Prep Station for Tight Kitchens
In a tight kitchen, every inch has to earn its keep, so size your prep station by the cabinet width and let the cutting board sit flush against the refrigerated rail, with common layouts at 27, 36, 48, 60, or 72 inches to keep tools from drifting into dead space.
You’ll protect sanitation efficiency and keep workflow staging smooth when the board fits the line instead of fighting it.
- Keep the board depth near 10–12 inches on a standard top, or 8–9 inches on a mega top.
- Hold every tool within a 12-inch pivot range, so you turn, not walk.
- Use longer cabinets for multi-piece boards and pull-and-swap pans, which keeps FIFO moving.
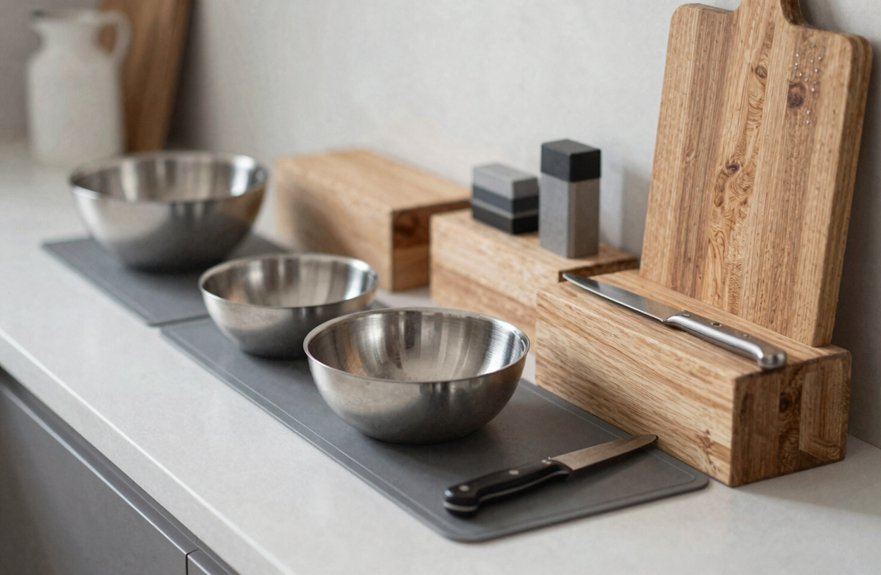
Pick the Right Prep Station Accessories
After you’ve sized the station to fit the kitchen, the right accessories help that space work harder and feel much easier to use. Choose a cutting-board holder and rail-adjusted boards with stoppers, so you stand comfortably and chop without slips. Add an encased knife holder to improve knife workflow and keep your blades within a 12-inch reach. Then place pan holders, including magic rings for small mise items, right under the work zone, so you move food with less fuss and more freedom.
| Accessory | Benefit | Best Use |
|---|---|---|
| Board holder | Reduces fatigue | Daily chopping |
| Knife holder | Faster tool organization | Safe, quick grabs |
| Pan holders | Cleaner transfer | Multi-task prep |
Pick durable finishes like stainless steel, chrome/Brite, MetroSeal3, or polymer to match your sanitation and visibility needs.
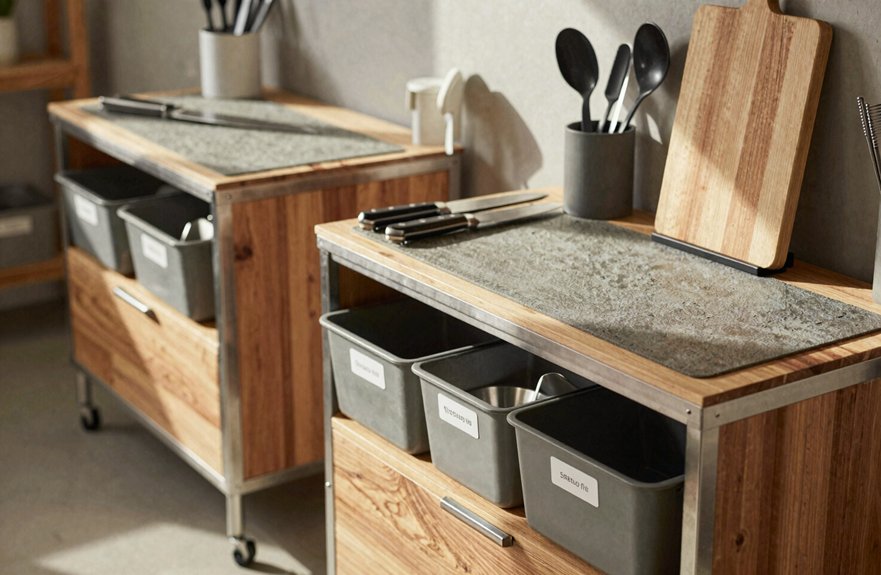
Match Shelf Materials to Your Workflow
As you match shelf materials to your workflow, think about how fast your team moves and how often you need to grab, set down, and swap tools. Choose a Workflow fit that keeps freedom in your hands and friction off your station. Solid stainless tops help heavy trays stay put, while wire bottoms keep pans visible and easy to swap.
- Go with solid metal when you prep hard and fast
- Use wire shelves when airflow and quick reach matter
- Pick cleanable finishes, like epoxy or stainless, for sanitation routines
Consistent posts and shelf layouts give you stable landing spots, so your hand finds each tool without a second thought. That steady setup saves time, supports clean habits, and keeps your compact station ready for whatever comes next.
What the 20% Productivity Test Measured
The 20% productivity increase claim for PrepMate came from testing real users during food prep work, where the station helped them move faster than they could at a traditional prep table.
To measure real time workflow, testers watched you compare prep methods, track each cut, scrape, and transfer, and note where delays showed up.
The setup also let you reduce setup time, since scraps could go straight into pans under the board, instead of making extra trips.
Penn State University’s Center for Food Innovation helped validate under conditions that matched real station use, not a lab fantasy.
That means the gain wasn’t just theory, it reflected everyday speed, less searching, and smoother task flow.
You get proof that better layout can free up your pace and your day.
How Prep Station Mobility Boosts Output
Mobility gives a compact prep station a real edge because it helps you move the table where you need it, then lock it firmly in place when it’s time to cut, assemble, or plate.
With compact layout planning, you can set up workflow zoning options that keep tools inside a 12-inch reach, so you waste fewer steps and keep your rhythm steady.
That freedom lets you pivot once, finish faster, and stay focused on the task, not the trek.
- Roll the station near the action, then brake it.
- Keep the board, tools, and pans close at hand.
- Let prepped items drop right into storage below.
In testing, PrepMate-style mobility helped users boost output, and that kind of smooth movement can support about 20% more productivity when your setup stays smart and tight.
Why Adjustable Height Reduces Fatigue
When you set your prep station to the right standing height, you give your back and arms real relief, so chopping feels smoother and less tiring.
You can match the board to your body instead of forcing yourself to bend, reach, or hunch, which helps keep each cut steady and comfortable.
With less strain pulling your focus away, you stay more alert, and your tools feel easier to use, not like they’re playing hide-and-seek.
Back And Arm Relief
Because prep work can last for hours, an adjustable-height cutting board can make a big difference in how your back and arms feel by the end of a shift. You get better ergonomic reach, and that reduces strain when you chop, slice, and move fast. With rail-based setups, you can set the board once, lock it in, and keep a wrist safe workflow that supports posture consistency all shift long.
- Raise the board to a standing height that fits your body.
- Keep the board steady so your shoulders don’t do extra work.
- Cut with less twisting, less reaching, and fewer tired muscles.
Fixed tables can leave you bent, lifted, or tense, but an adjustable setup helps you work with more freedom and less wear.
Standing Height Precision
An adjustable prep station does more than ease strain on your back and arms—it also lets you set the board at a standing height that feels right for your body, so you can work in a neutral position instead of fighting the table all shift.
With height matching, you keep your wrists, shoulders, and spine lined up, which supports an ergonomic workflow and cuts down on that slow build of fatigue.
Fixed tables can sit too high or too low, and that mismatch makes every chop cost more effort.
A rail-and-stopper setup holds the board steady, so it won’t wander while you slice.
You’ll make fewer stretch-and-correct moves, keep accessories close, and move through prep with more ease, freedom, and control.
Less Fatigue, More Focus
A well-set adjustable-height prep station can quietly take a lot of strain out of your day, since it lets you place the cutting board at a standing chopping height that fits your body instead of forcing you to bend, reach, or hunch. That comfort helps you stay sharp, because your arms and back aren’t wasting energy on avoidable tension. With better workflow optimization, you keep moving with less stop-and-start effort.
- You hold steadier knife control.
- You avoid fatigue-driven form changes.
- You reset less, thanks to a smarter knife placement strategy.
Sturdy board stoppers also keep everything from sliding, so you work at an ergonomic height with fewer pauses. Compared with fixed tables, this freedom lets you prep longer, smoother, and with more focus.
Choose the Best Prep Station Finish
When you choose a prep station finish, start with the real conditions in your room, not just the look on the catalog page. If you face strong cleaners, steam, or constant wipe-downs, pick stainless steel or MetroSeal3, since their non-porous surfaces resist residue and help you move fast with less fuss.
Smooth chrome or stainless also supports Tool visibility, and workflow consistency, because tools stay easier to spot and clean. In drier spaces, coated options like Brite, polymer, or epoxy can work well, but they may show wear sooner.
Think about how often your hands and tools touch the surface, then choose the finish that cuts drag, keeps upkeep simple, and gives you the freedom to focus on the task, not the table.
Best Uses for a Compact Prep Station
For busy lunch and deli service, a compact prep station really shines because it keeps tools within a 12-inch reach and lets you pivot without taking steps, which cuts wasted motion during repeat sandwich builds.
You’ll love it when you need time saving staging, with bread and spreads first, proteins and cheeses mid-rail, and produce finishers last, so your line keeps moving.
It also supports FIFO rotation, since you can pull, swap, date, and use the remainder first without slowing down.
Use it for:
- allergen zoning at one clean end of the rail
- portion consistency with color-coded spoodles and spot checks
- fast, free-flowing service during high-volume lunch rushes
That setup helps you stay nimble, keep control, and serve more with less strain.