You’ll get better results from a kitchen that moves staff cleanly from prep to cook to plate than from one that just looks polished. Map the workflow first, then build clear hot, cold, and dish zones, keep storage close to each station, and leave wide paths for one-way movement. Add bright task lighting, slip-resistant floors, and durable, easy-clean equipment, and service stays faster, safer, and a lot less chaotic; there’s more to sharpen every shift just ahead.
Key Takeaways
- Design clear one-way workflows from prep to cook, plate, service, and dish to cut wasted steps and cross-traffic.
- Separate hot, cold, and service zones so staff move efficiently without colliding during busy shifts.
- Place storage beside each station, keeping tools and ingredients within easy reach to reduce walking and searching.
- Use open, wide circulation paths with proper spacing so servers, carts, and kitchen staff can move safely.
- Prioritize slip-resistant flooring, strong task lighting, and durable materials to improve safety and speed, not just appearance.
Why Kitchen Layout Matters More Than Looks
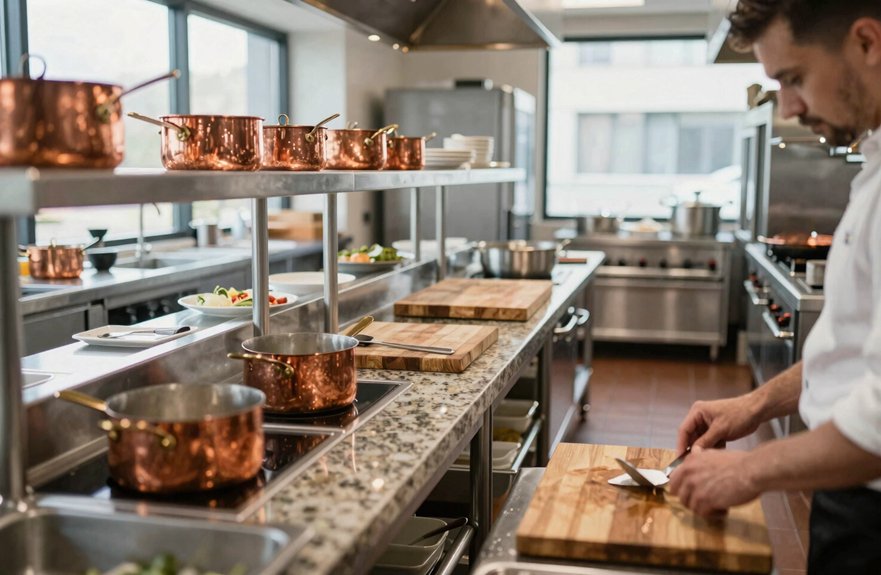
A smart kitchen layout does more than fill a room, it shapes how smoothly every shift runs.
You can cut wasted steps by nearly 30% when you set clear paths between prep, cooking, and plating.
That freedom keeps your team moving, not circling.
When you separate hot, cold, and service zones, you reduce cross-traffic, lower accident risk, and speed up every order.
Good spacing also helps ventilation work better, so heat doesn’t wear people down.
With smarter station placement, you improve staff comfort, keep Noise control easier, and make maintenance access less of a headache.
Add strong lighting, clean sight lines, and smart storage, and you’ll spot problems fast.
Regular workflow audits help you keep the layout working for you, not against you.
Map Your Restaurant Kitchen Workflow First
Now that the layout supports smoother movement, the next step is to map how work actually flows through your kitchen, because even the best-looking space can slow people down if tasks cross paths.
Trace each step: prep, cook, hold, plate, and wash, so your team moves in one clean direction. Use workflow zoning to keep hot, cold, and service areas from colliding, and set equipment spacing so nobody squeezes around corners like they’re late for a bus.
| Task | Focus |
|---|---|
| Prep → cook | Direct, short path |
| Hold → plate | Fast handoff |
| Service → dish | Separate traffic |
Place receiving and storage near the entry, then check lighting, safety paths, code, and ventilation before you lock in station spots. That way, you protect freedom of movement and keep rush-hour chaos from bossing you around.
Build Clear Prep, Cook, and Dish Zones
You’ll work better when you split your kitchen into clear prep, cook, and dish zones, because each area can support one step in the flow without crowding the others.
Keep cold prep near storage, build the hot line around your ranges and ovens, and give plating its own service spot so staff can move in a clean, logical path.
When dishwashing stays on a separate dirty-to-clean route, you cut cross-traffic, save steps, and help everyone move safely, without playing a game of kitchen dodgeball.
Prep Zone Separation
Separating the prep zone, cook zone, and dish zone gives your kitchen a natural flow, so staff can move from prep to cook to plate without crossing paths or wasting steps.
Use workflow mapping to place each station where it helps most, and keep temperature control in mind by putting cold prep near storage and away from heat.
Cluster hot equipment under the hood, so your team doesn’t zigzag like it’s chasing a lost ticket.
Give each prep station enough space, because freedom in the kitchen starts with room to work.
Set dishwashing apart as its own area, so dirty items head one way and clean plates stay clear.
This layout cuts congestion, lowers mistakes, and helps you serve better food with less stress.
Cookline Workflow Clarity
A well-planned cookline works best when each area has a clear job, with hot cooking, cold prep and storage, and final plating all set up so staff can move smoothly from one step to the next.
You can map the path from receiving to prep, then cooking, then plating, so every task stays near the tools and ingredients it needs.
That cuts wasted steps and keeps service moving.
Add workflow signage and clear staging points, so each handoff feels obvious and error proof handoffs happen without guesswork.
Keep dishwashing separate from active cook and prep zones, and give every station open access to shelves, tools, and runners’ paths.
When you build this kind of flow, your team works with more freedom, less stress, and far fewer bottlenecks.
Dish Area Efficiency
Build the dish area like a true service zone, not a catchall corner, so dirty plates move through a clear wash stage, sanitizing stage, and drying or return stage without crossing paths with prep or cooking traffic.
You’ll keep menu turnover strong when the walk-back route stays open, direct, and wide enough for servers to move without weaving through coworkers.
Protect server safety by leaving clear table-to-wall space, adding bright task lighting, and using anti-slip floors around hot, wet spots.
Store racks and extra dishware in closed shelving off the main aisles, because clutter slows you down and invites slips.
Treat this zone as the final cool endpoint in a zone-style kitchen, and you’ll support smoother equipment maintenance, cleaner flow, and a layout branding that feels free, organized, and ready for busy service.
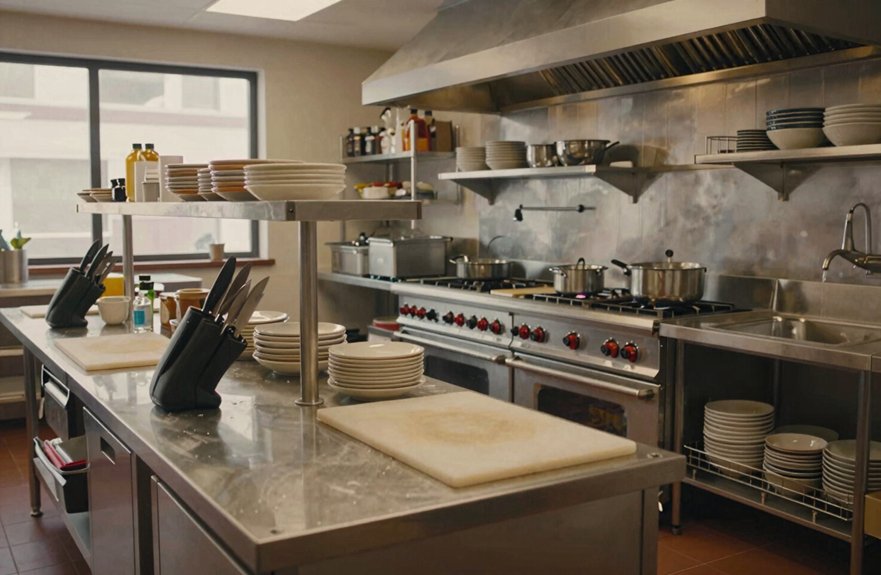
Place Storage Close to Each Station
You can speed up every task when you place storage right beside each station, so your team reaches dry goods, tools, and prep items without wasting steps.
Keep cold ingredients, shelf-ready supplies, and cleaning gear in the zones where they’re used most, and you’ll cut down on floor clutter and those annoying little kitchen traffic jams.
When storage stays close and organized, your kitchen feels calmer, moves faster, and lets staff focus on cooking instead of hunting for what they need.
Station-Side Storage
At every station, smart storage should sit close enough that staff can reach the tools and ingredients they use most without extra steps or wasted motion.
You can keep glove and label supplies, seasoning, squeeze bottles, and small prep tools right at hand, so your team moves with ease and confidence.
Use tool staging on front rails, shelves, and safe under-counter drawers, matched to each zone, whether hot, cold, or plating.
Keep grab-now items up front, and tuck restock-later stock deeper back, so the station stays clear and free.
Enclosed, clearly marked containers help you avoid clutter, reduce tripping risks, and keep traffic flowing during busy service.
When storage supports your rhythm, your kitchen feels freer, faster, and far less cramped.
Faster Ingredient Reach
Keep the ingredients close, and your kitchen can move a lot faster. You’ll want dry storage, prep storage, and daily-use items within a few steps of each station, so your team grabs what it needs without crossing the room. That freedom cuts waiting and keeps service flowing. Use workflow bottleneck analysis and grab time measurement to spot slow spots, then place high-use SKUs at waist to eye level.
| Station | Nearby items | Benefit |
|---|---|---|
| Sauté | Sauces, spices | Faster fire-ups |
| Cold prep | Proteins, vegetables | Fewer searches |
| Plating | Pan racks, garnish | Smooth final runs |
| Hot pass | Labeled drawers | Quick refills |
| Prep line | Pull-out organizers | Easy reach |
Keep storage in order, from prep to plating, and you’ll dodge zig-zags, trim effort, and stay ready for peak service.
Less Floor Clutter
When storage sits right beside each station, the floor stays clearer and the whole kitchen can move with less friction.
You keep prep tools, hot-side gear, and plating items within arm’s reach, so you don’t waste steps or crowd the main aisle.
Use under-counter drawers, low shelves, and backup ledges to support tool organization and minimize obstructions.
Keep cold storage near the cold-prep zone, and place dry storage in a separate controlled area with modular shelving, so clutter doesn’t drift into service.
Clear no-storage paths for deliveries and the service route, because open walkways help reduce trip hazards and keep movement free.
With strong workflow zoning, each area supports clean access storage and waste free staging, giving you more room to work.
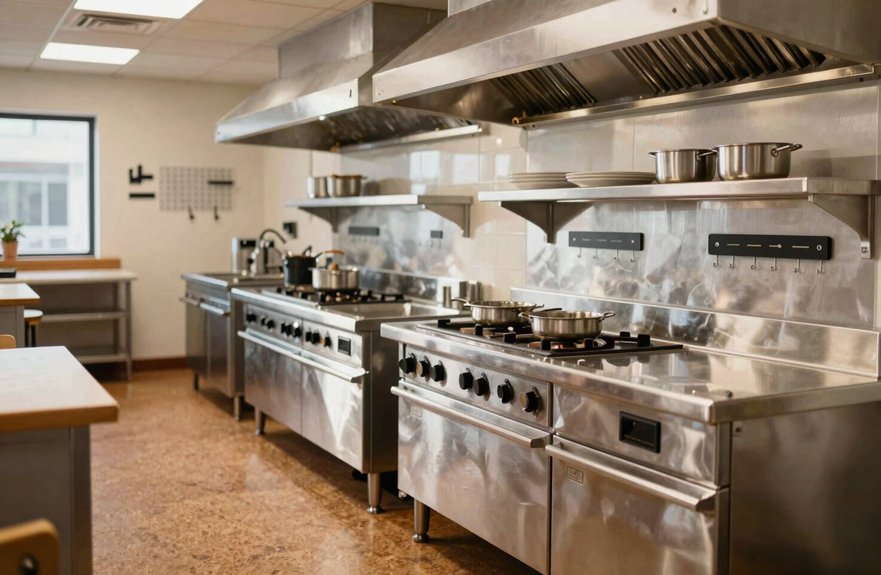
Choose a Layout That Reduces Staff Traffic
To cut down on wasted steps and crowded walkways, choose a kitchen layout that supports a clear, steady flow of work from prep to cooking to plating.
You’ll get better workflow bottleneck control when you use a zone-style setup with hot, cold, and service areas, because staff can move in one direction without bumping paths.
Smart aisle traffic planning also means placing prep and storage close to the stations that use them, so your team spends less time hiking and more time creating.
If you run an open kitchen, keep back-of-house routes off-limits to guests.
In larger spaces, an island can help center production, but cluster plating and finishing nearby.
That way, your kitchen stays fast, flexible, and free.
Add Safe Flooring And Task Lighting
Once your kitchen layout keeps people moving in the right direction, the floor and lighting should help that flow stay safe and smooth.
Choose slip-resistant tile or vinyl with textured finishes, because greasy spills and wet shoes can turn Kitchen Foot Traffic into a hazard fast.
Make Slip Resistance Checks part of your routine, since worn surfaces lose grip over time.
Put task lighting over prep, plating, and dish areas, so you can spot dropped tools, wet spots, and other trouble before they slow you down.
Keep light even and glare-free near stainless steel and floors, so no shadow zone hides a spill.
Pick NSF-listed, easy-clean materials, and your surfaces will hold traction and brightness, even when the kitchen’s working hard.
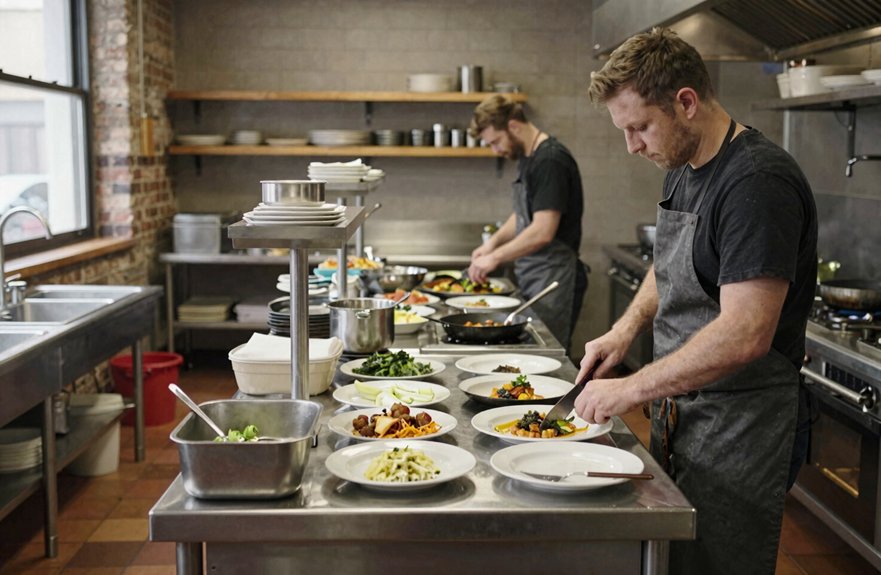
Design for Fast, Clean Service
You can speed up service by giving each prep station its own clear spot, with tools, ingredients, and storage close by, so your team isn’t wasting steps or searching under pressure.
When you set up clean, direct paths from prep to cooking to plating, you cut cross-traffic and help every order move in a steady flow.
Keep dishwashing, waste handling, and wipe-down areas on the shortest practical route, and your kitchen stays cleaner, faster, and far less likely to trip over its own shoelaces.
Efficient Prep Stations
Efficient prep stations work best when every tool and ingredient has a clear place, because speed in a kitchen starts with less searching and fewer extra steps.
You can build freedom into your line by matching menu timing to station standardization, so each cook knows what to grab, where to stand, and how to move.
Keep cold-zone tasks, like salads and sauces, close at hand.
- Set counters, sinks, and refrigerated drawers in one smooth flow.
- Use code-safe sinks and roomy worktops at the point of use.
- Store extras off the floor and behind the counter to cut clutter.
- Keep the area bright, dry, and slip-resistant, so small mistakes don’t slow you down.
Clear Service Paths
When guests and staff can move without stopping to rethink their route, service feels smoother and the whole dining room works better.
You can protect that flow by shaping clear service paths from the host stand to tables and back to the kitchen, with straight or gently curved walkways that don’t dead-end.
Keep table spacing at 24–36 inches so server circulation stays open for you and bussing carts.
Place the host where entrance sightlines stay direct, then send drinks and early check-backs along open lines, away from the bar and waiting zone.
Separate bar, dining, and waiting areas with their own routes, so you won’t cut through guest traffic.
In the kitchen, connect the plate-up point to the floor path with a short, direct run, and your team can move faster with fewer spills.
Choose Durable, Easy-to-Clean Equipment
Durable, easy-to-clean equipment can make a kitchen run smoother from the start, because every surface, hinge, and base affects how fast your team can move and reset. When you choose NSF certifications and commercial-grade gear, you protect food quality and keep your setup dependable, so you’re freer to focus on service, not repairs.
- Pick stainless steel and other seamless finishes for quick wipe-downs.
- Use anti-slip, stable bases so wet cleaning doesn’t slow you down.
- Match hoods and grease control to heat output, so grime stays contained.
- Keep modular racks and latching bins nearby, so tools don’t wander off.
With the right equipment, you cut buildup, save effort, and keep your kitchen ready for the next rush.
Meet Safety Codes Without Slowing Service
Once you’ve chosen equipment that’s easy to clean and built to last, the next step is making sure the whole kitchen meets safety rules without getting in the way of service.
You can design around OSHA-backed principles, keeping paths clear so staff move freely and avoid bottlenecks.
Place hoods and HVAC to handle heat and support odor control, so cooks stay comfortable and the line keeps moving.
Use CO2 sensors and layered lighting to improve visibility, cut slip hazard risks, and spot problems early.
Choose NSF-certified gear, protect circuits, and make outlets easy to see, so failures don’t stop service.
Build hot, cold, and service zones with prep and storage off the main floor, plus emergency access and a controlled delivery entrance, to keep traffic flow smooth and compliant.
Fine-Tune Details for Every Shift
To keep every shift running smoothly, shape the kitchen around a distinct workflow, so staff move in a straight line from hot cooking to cold prep and storage, then on to service and plating without crossing paths. You’ll save steps when you place walk-in coolers near prep, keep dry shelves close, and mark each station clearly with zone signage and equipment labeling.
- Use shift lighting that brightens corners and cuts slip risks.
- Keep receiving, delivery, and server paths open and direct.
- Place ventilation and hoods so guest-facing work stays calm.
- End each day with an end of day walkthrough to reset flow.
That simple setup gives your team room to move freely, keeps fatigue low, and helps every shift feel smoother, faster, and more in control.